Monday, March 18, 2019

Corned Beef and Cabbage

What's Irish and stays out all winter?  Paddy O'Furniture!  HAHAHAHA!

It's my favorite St. Patrick's Day joke!  No kidding!  I tell it to SOMEONE every single year.

I have heard about our Irish side of the family all of my life, but I remember few "Irish" meals growing up.  The exception is corned beef and cabbage.  I really love a good corned beef and cabbage.  Sadly, most that I find have little flavor because I believe that too many cooks boil it all in too much water.  My mother made hers in a CrockPot.  It was "hit and miss" on flavor.  This is how I make Corned Beef and Cabbage.  I feel that the flavor always comes through.

With a name like "O'Donnell", it had to be good!

First, find a good corned beef that has a small layer of fat along the top.  (I like the point cut over the brisket because I think it holds moisture better.)  I find that 3 pounds is about right for a few nights of healthy-sized meals.  Remove the corned beef and rinse.  Place it in a Dutch oven with the fat side up.  Rinse the bag out with a half-cup to cup of water and pour it over the Corned beef. 

Corned Beef rinsed and water added.  Oh, what is that little packet?
Many dump the spice packet in with the water.  I like to wrap mine in a cheesecloth "bag" so I don't bite in to the spices during dinner.  It's easy to make. 

Spices from the Corned Beef package.

Cut a piece of cheesecloth, wrap the spices in it and tie off with string.  Then drop the packet in the water next to Corned Beef.

Almost like a teabag of spices.

Cover the Dutch oven and bake at 250 degrees Fahrenheit.  (I generally estimate the time to fully cooked as an hour per pound for it to be fork-tender.)

Now it is time for choices.  You could par-boil your carrots, potatoes and lightly steam your cabbage so that they are nearly cooked before you add them to the liquid while your Corned Beef rests prior to serving.  OR you can add them all in about 60 to 90 minutes prior to the Corned Beef being cooked and save a step.  (60 minutes if you cut it small, 90 minutes for bigger veggie pieces.) 

Potatoes and Carrots on the bottom.  Top with Corned Beef, and Cabbage Wedges on Top.

For this 3 pound Corned Beef, I added about 1.5 pounds of baby potatoes, a pound of baby carrots, and 1/2 head of cabbage cut into six pieces.  Cover and continue to bake until the beef is fork tender.

Now it may be that the veggies are not quite done to your liking at this point.  If they need to cook more, pull the Corned Beef so it can rest, discard the spice packet, and put the Dutch oven on the stove top, and then simmer until done.  (If overdone, make note of the time you put them in and adjust the next time you make it.)

To serve, plate it and pour a bit of the cooking liquid over the top. 

Ready for Dinner!
When your leftovers get down to nearly nothing, dice whatever is left over and create an Irish "bubble and squeak."  (To make this, dice a small onion and saute in a chunk of butter.  Add everything leftover after dicing it up.  Think of it like a twist on Corned Beef hash.)

Delicious and hearty.  May the luck of the Irish follow you until you land in heaven days before the devil knows you are gone!

Saturday, March 16, 2019

Granny's Potato Soup

I call this "Granny's Potato Soup", but I think all of the "moms" in her lineage made it. I've mentioned a few times that I view my mother as part-Momma/part-WitchDoctor.  It's true. She always had some kind of concoction that could help anything.  One of them is this potato soup recipe.  Now, it is not simply potato soup: It's an amazing elixir that can cure anything. Yes, you heard me right. It. Cures. Anything. Sickness. Heartbreak. Life Disappointments.  All will be better after eating a bowl of this delicious potato soup.  I promise.

No worries, Miranda. When she is older, you will fix Claire right up with this soup just like your grandma did for me!


I've been sick with some sort of sinus madness for over a week. Antibiotics and decongestants have resulted in limited improvement, so I felt that I needed to pull out the big guns and make potato soup.

The ingredients are simple: Butter, salt, pepper, onions, potatoes, flour and milk.  For the love of family history, use real butter and whole milk, because you are not going to cure sickness or heartbreak with skim milk or oleo. Personally, I prefer starchier potatoes for this recipe but I only had some baby Yukon Gold new potatoes on-hand today.  They work well-enough.  Plus, since they are baby potatoes, I did not bother to peel them.  If buying potatoes, I'd likely go with Russet potatoes and peel them.

Onions, butter, salt and pepper
For ratios, I'd estimate a small-medium onion for a pound of potatoes. A teaspoon of finely-ground black pepper, 2 teaspoons salt, 3 tablespoons of butter, a third-cup of flour, and half to whole cup of milk.

With potatoes and water
Peel and dice your onion. I like a smaller dice, but the dice is up to you.  Peel potatoes, if needed, and dice them to spoon-sized pieces.  Rinse again after cutting the potatoes.  Add the onions and potatoes to a pot with the pepper, salt, and butter.  Add water until the potatoes are barely covered. Bring to a boil and simmer until the onions and potatoes are soft, which takes about 30 minutes.  Stir from time to time - more if the potatoes are starchy.

Flour and Milk
Make a slurry of flour and milk.  Whisk it so that it is very smooth.  Slowly pour it into the simmering soup while stirring constantly.  Once it thickens to the point that you want, keep stirring for another full minute.  (If too thick, add more milk and stir for a minute.  If not thick enough, add more slurry and cook a full minute after it reaches the desired thickness.)  Adjust salt and pepper.  Do not fear either, but keep in mind that salt can dissolve to overly-salty very quickly.

Soup!

Serve with saltines, if desired.


Variations: Cheese, bacon, and scallions are nice to add....but it is no longer Granny's soup.  I cannot vouch for its healing properties.

If you add no onions and make it thicker, it is essentially your grandmother's "creamed potato" recipe. She often made creamed potatoes as a side to go with fried fish (usually ocean perch) in the winter.  She also made scalded bread with it.  Delicious!

Potato soup can be made in advance, but will develop a skin on the top.  It will melt away when you stir it in.  Add milk to thin it, if needed.

Your grandmother would make this to help us "break a fever" when we were small.  It's actually pretty good for that purpose.  Also, it will get congestion moving.


Sunday, January 7, 2018

Collard Greens

To be honest, I do not remember Granny or MeMaw making Collard Greens.  However, there was/is a recipe written in one of the cookbooks.  We all thought the recipe came from Grandma Dora, because Granny had written what Mom thought was "Mom's Greens."  When I saw the recipe, I noticed that Granny had written "Maam's Greens" in her curvy handwriting.  Ma'am was a woman who worked with Grandma Dora as she ran the dairy and cooked in camps and at schools.  So the story goes, Ma'am was a black woman who was widowed with six children.  She needed money.  Grandma Dora, who was also widowed, needed help. I have a Ma'am doll, and cannot remember where it came from.  Granny used to say that Ma'am treated her along with her sister Mary Jane as if they were her own.

I do remember Ma'am meeting Granny in town and would scoop her up in a huge hug.  I also remember Granny being very sad when Ma'am died.  I was in elementary school when Ma'am passed, and Grandma Dora had died the year before I was born.  Ma'am, like Grandma Dora, called Granny "Thellen," which was short for Martha Ellen.  I can still hear her say, "Come here, Thellen!  Come here!"  Then once she wrapped her arms around Granny, she would rock her and say, "Here's my baby!"  Ma'am did not care where we were or who was around.  Granny got rocked and the rest of us would be fussed over.  Once, Sandy who was a toddler, shied from Ma'am.  It mattered not.  She got squeezed and hugged like the rest of us.

I thank whoever put them in the book.  These collard greens are hands-down the best I have had and they are easy to make!

Collard Greens with Bacon - Ready to EAT!

 Here is what you need to cook a pound of collard greens.
  • Some smokey meat.  Ham hock, smoked turkey leg, etc.  I used 3 slices of thickly-sliced bacon today. As time goes on, I find I use bacon more and more.
  • Oil.  I use olive or avocado oil along with bacon fat.
  • 1 medium onion, chopped
  • 2-3 cloves of garlic, chopped finely
  • 1 teaspoon of black pepper
  • 1 good pinch of crushed red pepper
  • 3 cups of chicken broth if not using ham hocks.  (I've used bouillon and "Better than Bouillon" works well too.)
  • Salt to taste....it depends how salty the stock is.
  • HotShot to deepen the heat if desired.  (Nieces and Nephew should not tear my heart out by not having HotShot on hand.  I would worry about your upbringing.)
  1. So cook the bacon until crisp, if using bacon.  Keep the grease.  If not using bacon, just go to the next step. 
    Bacon cooked crisp.
  2. Saute the onion in the bacon grease and a tablespoon of olive oil.  (If no bacon, use two tablespoons.)  Stir until softened.
    Sauteed onions!
  3. Add garlic and stir for about two minutes.
    Garlic and onion in bacon grease and olive oil.  Mmmm.
  4. Crumble bacon and add back to the pot along with (or add meat), black pepper, red pepper flakes, salt, broth, and a few shakes of HotShot.
    This is in your spice rack, right??
  5. Stir.  Dump in a pound of collards.  Let it wilt.  Stir again.  
    It will wilt.
  6. Cover and let simmer for 45 minutes or so.
 Serve this up with lots of things: Soup beans, mac-n-cheese, fried chicken, etc.  Only one thing really must be included and that is cornbread.  The pot "likker" is just too good to omit it. 

Thursday, October 22, 2015

Mary Angeline Fuson's Apple Stack Cake

While talking with my oldest niece Jennifer, I realized that I need to add a bit more about our family's history in with some recipes.  Granny's mother's name was Dora Evans Wolfe.  Granny loved to play up the "country roots" of her family.  While we do have some "very country people," it is important to note that we also are directly descended from landed-gentry and most of our lines trace back to pre-American Revolution days.  On this side of the family, there are owners of original land-grants in the new world and we have early settlers, politicians, notable doctors, etc., and we are reported to be directly descended from Martha Custis via Robert E. Lee's line through Grandma Dora.

Dora Evans Wolfe
Grandma Dora's mother was a Fuson, which Granny cherished playing up how very rural they were.  So how did a land-gentry family find itself in the middle of no where in the Tri-State areas of Virginia, Kentucky and Tennessee?  It's a story full of twists and turns.  Here is how I understand it - starting with the Fusons.

Richard Fuson first came to the new world from England in 1652 in hopes of finding rumored opportunities and seeking to own land.  He took up residence in Hanover, VA and married a young woman named Elizabeth when he was in his 30s.  With Elizabeth, he had several children over the span of roughly 20 years.  His last son, William, was born in Hanover in 1715.

William also married a woman named Elizabeth, who was also born in Hanover, Virginia in 1715.  William held a small farm and he also had interest in his father's business in the town of Hanover.  (It's odd, but sometimes William is listed as "Fuston," though I am unsure why.)  After William's father died, William took Elizabeth back to England to visit his father's family.  While traveling in Wales, Elizabeth gave birth to John Fuson in 1736.  The family then returned home to Hanover, Virginia for a time.

John Fuson grew up in Hanover, Virginia and married a woman named Elizabeth Wheeler, daughter of Thomas Wheeler and Phoebe Saxon.  Elizabeth was 9 years younger than John and her father was reputed to be overbearing.  John had several children with Elizabeth Wheeler, but several died very young.  In 1760, they had a son named Thomas while living in Hanover.

Though John's father had a fine farm in Hanover, after the marriage to Elizabeth Wheeler, William sold his farm and William and his wife Elizabeth, John and his wife Elizabeth and their children used the money to purchase a huge land area near Amelia, Virginia, which is approximately 50 miles on the other side of Richmond away from Hanover.  (It makes me wonder how overbearing and influential Papa Wheeler was.)

Thomas Fuson fought in the American Revolution which took him to an area near Mount Olivet, Kentucky.  He loved the beauty of the area, especially in the more mountainous regions.  Surviving the American Revolution, he was granted a land bounty of 800 acres in the Tri-State area of KY-TN-Va for his service to the new country.  He married a woman named Rachel Permelia Robinson and broke the curse of the Elizabeths as wives.  Rachel and Thomas had several children who scattered through the Kentucky region.  Thomas and his wife moved to Big Clear Creek in Knox, Kentucky with one set of their children, where they died at the ages of 89 and 91 respectively.

Thomas and Rachel had a son named James Robinson Fuson, who was born in Green, Tennessee on his parent's land on December 31, 1800.  People could be quite scattered on the large land plots obtained via cash or land bounties.  When James was 15 or 16, the neighboring family had a daughter named Katie Lee.  Over the years, he watched her grow up, and when she was 15, James married her.  It was said that no man ever loved anyone as much as James loved Katie Lee, but she was frail.

Within the year, Katie Lee and James had a son named Bothican Fuson, however within three days, both Katie Lee and Bothican died.  James was heart-broken and inconsolable.  Family legend has it that he burned the small house in which he and Katie Lee lived before moving to a remote location in the mountains on the family land where he lived alone for approximately 10 years.

Now it is interesting to note that the last recorded Indian raid in Kentucky was 1793, but hunting parties continued for many years after that.  After moving, James' nearest neighboring family's last name is Stanifer (or Staniford.)  According to the story, there was a Blackfoot Indian hunting party that was caught in a flash flood which killed most of the Indians.  (Other tribes known to the area have been Shawnee, Yuchi, and Blackfoot, but we were told the tribe was Blackfoot.)  A lone Indian girl was found along the flood route and she was adopted by the Stanifer's.  They named her Ruthy Jane and it is believed that she was born around 1825.

Ruthy Jane Stanifer
James considered Ruthy Jane a "lucky woman."  After all, what are the chances that an Indian child would survive a flood and then be adopted by a family who would raise her as their own, and teach her fine behaviors?  He married Ruthy Jane when she was nearly 20 years old.  Together they had three children: Matthew, Mary Angeline, and Millard.

Though James never left his remote location in the mountains prior to being quite old, he built Ruthy Jane a sturdy home and ensured his children received an education that included religion and etiquette.  Granny spoke of going to see the James Fuson family home on the first time that she road in a car.  Evidently the car twisted up a path on the mountain causing the adults to have to get out and push multiple times.  Granny thought the family who lived there were some feudal mountain folks.  Obviously the trip made an impact on her.

James doted on Mary Angeline, who was born in 1854 in Chenoa, Kentucky in the home of Ruthy Jane's family.  She was beautiful to the point where suitors came calling from all over the area.  According to the stories, when suitors called on her, James would put them to work for hours in exchange for allowing them to speak with Mary Angeline for just a few moments, but then he would send them away so they would not get caught in the dark on the mountain.

Mary Angeline Fuson
Fearful that Mary Angeline would never find a suitable match with such an over-protective father, Ruthy Jane sent her back to Chenoa under the guise of Mary Angeline assisting a sick relative.  There she met a gentleman farmer named Shelton Evans who proposed.  They married and had 13 children, one of which was Grandma Dora!  It was not quite that simple, of course.  Shelton had to meet Mary Angeline's father.

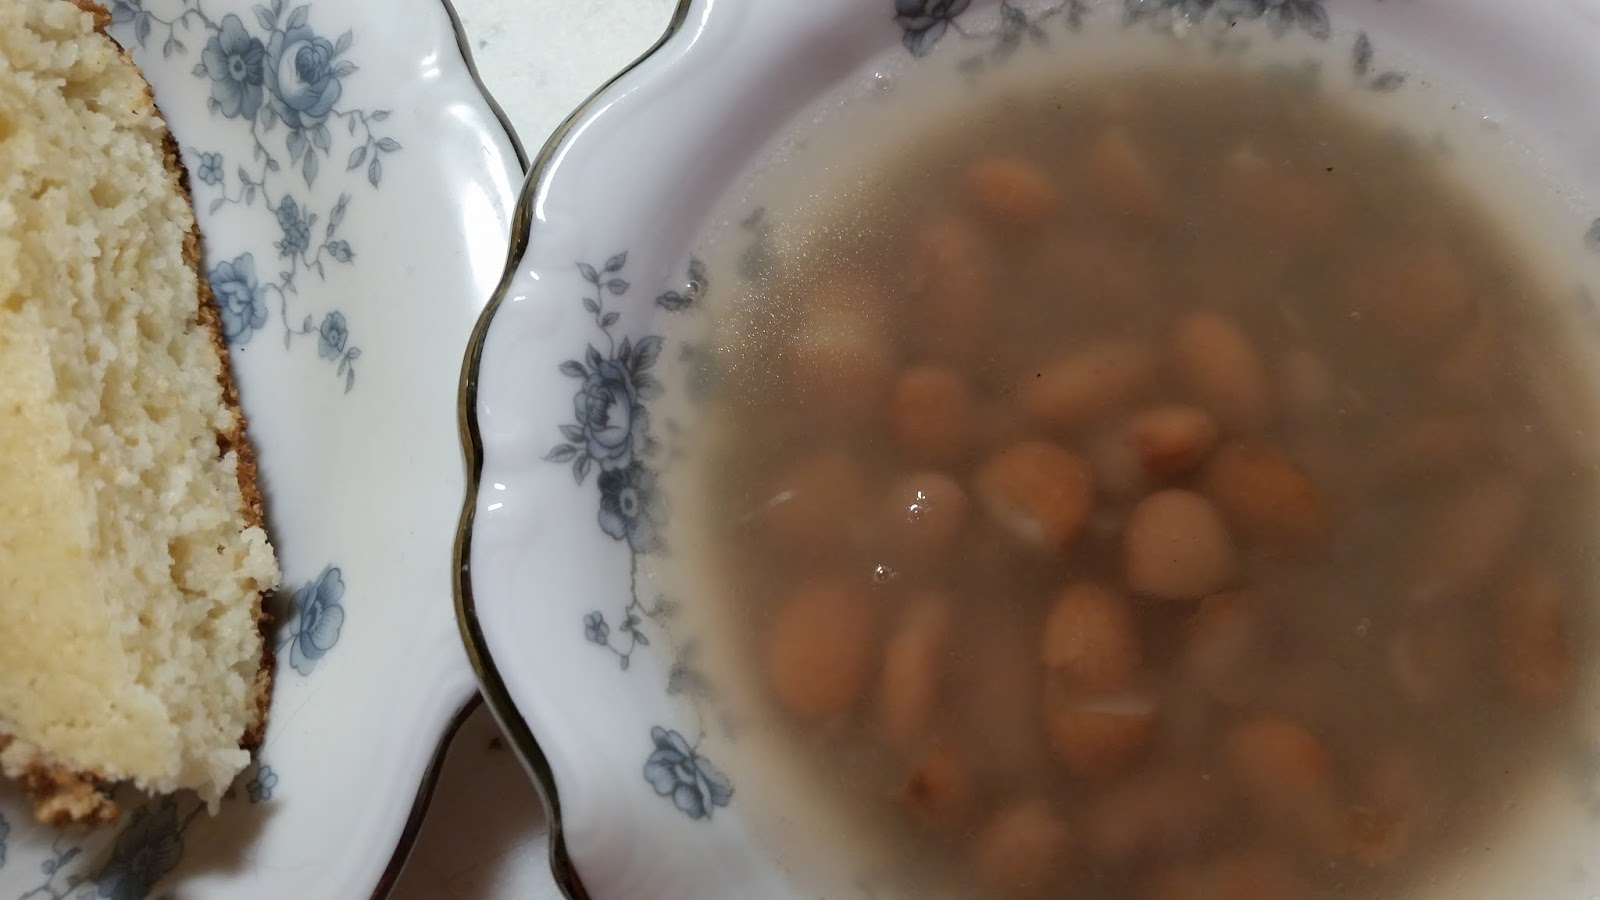
Shelton Evans accompanied Mary Angeline home along with several relatives of both Ruthy Jane and James, who were quite sure that the boy would be shot for turning James' only daughter's head.  The couple married in a tiny chapel and there was a reception at James' home.  An apple stack cake was served as a wedding cake, which later family members (Granny and Mom and probably Grandma Dora) viewed as "terribly country."  To be fair, molasses and unrefined flours were much more common than white sugar and flour.  Plus, I hear these cakes are really good.  I have the list of ingredients without many instructions for this cake.  I've never made it nor have I tried it, but I plan to make it for Thanksgiving or Christmas this year!  So pictures will follow when I do.

Mary Angeline's Apple Stack (Wedding) Cake

Filling:
  • 4 or 5 packed cups of dried apples
  • 1 cup brown sugar, firmly packed
  • a spoon of ground cinnamon - I'm guessing a teaspoon.
  • a spoon of ground ginger - again, I'm going to guess a teaspoon.
  • scant spoon of nut spice.  I'm going to guess mace or nutmeg and maybe 1/2 teaspoon.
  • water to match the apples so 4 or 5 cups
Put apples and spice in heavy pan with sugar.  Cover with water.  Bring to boil and simmer.  Stir often until thick like apple butter.  Use masher to make smooth.  (I am going to guess it needs to be like apple butter, so add water if it gets more dry, etc. 

Layers:
  •  Bowl of flour more or less.  I have no idea.  I'll try with five cups of all-purpose flour and add if needed based on the other ingredients.  The actual flour used here could be a lot of things, including acorn flour though.
  • a spoon of baking soda - teaspoon
  • a spoon of baking powder - teaspoon
  • a spoon of salt -teaspoon
  • large heap of shortening (I'll try with Crisco - perhaps 2/3 to 3/4 cup.)
  • cup of granulated sugar - a precious commodity
  • cup of molasses
  • 2 eggs beaten
  • cup of buttermilk
 Bake medium in small iron skillets with grease and flour in 7 layers.  Put filling between layers and cover to let set for 2-3 days.

Okay, not much direction, but this is what I will do.  Stir the dry ingredients together.  Beat the sugar and shortening together.  Add eggs and beat after each one.  Then add dry ingredients alternating with buttermilk.  The dough is supposed to be cookie-like so I assume stiff.  I know that it is patted out in the skillets in like thin (1/2 inch, maybe) layers.  I'll prick the dough all over and bake until done - maybe 10 or 15 minutes.  (The reason is that the apple filling is supposed to soak in the cake layers as one takes them from the oven.)  Once the cake is assembled, cover it and let it rest at room temp for two or three days before cutting.

I know that apple stack cakes are suppose to have an odd number of layers.  Likely due to the religious connection of the holy trinity or the power of 7.  I also know that it is rumored that people would bring layers to weddings to make a cake for a couple, but I don't think this can be true because it has to set and soak for several days.  Likely something the mountain people made up to joke with out-of-area visitors who wanted the recipe.  :)

Family legend also has it that James would not speak to either Mary Angeline or Shelton until Mary Angeline had a daughter of her own.  At that point, all was forgiven!

Wednesday, October 14, 2015

Scalded Bread

Some people call this kind of cornmeal bread "corn pone."  I thought it should be called "scalded hands."  From my understanding, scalded bread has roots back to our Native American ancestors.  It's easy to make with a bit of practice.  We always had it with beef stew and sometimes with pork-n-beans.  There is another cornmeal-based fried bread that Mom made that was a cross between this recipe and cornbread.

Put the well-seasoned, cast-iron skillet over a low heat.

Estimate about 1/2 cup of cornmeal per person.  Start by boiling an equal amount of water and 1/2 teaspoon of salt per serving.  Here I am making a recipe for one, so 1/2 cup of water with 1/2 t. of salt is heated to boiling.

1/2 cup water with 1/2 teaspoon salt
Once the salted water comes to a boil, add the cornmeal.  Again, the cornmeal amount should match the amount of water.  We only used white cornmeal for scalded bread. 

1/2 cup of white cornmeal added.
Give the cornmeal a good swish into the water so that everything is of even consistency.  It will be super sticky.  Let it rest for a moment.

Hot Crisco (or fat) in a HEATED cast iron skillet. 
I cannot stress this enough: Use a seasoned cast-iron skillet.  And be sure that the skillet is thoroughly heated prior to dropping in the fat.  If both of these are not done, the dough will weld to the bottom of the skillet.  Seriously.  I'm not kidding.  Don't even try it for giggles.

Sprinkle cornmeal if the dough needs to be more stiff.
While the fat heats in the skillet, return to the dough.  It should be pliable like play-dough, and the consistency should be even.  If needed, sprinkle a teaspoon of cornmeal at a time over the dough and work it in.  There should be no lumps visible.

BE SURE HANDS HAVE BEEN DRENCHED IN COLD WATER!!!
Turn on the cold water and get the hand wet and cold.  (This dough is like hot lava.  You need cold, wet hands.)  Then spoon a bit of the hot dough into the hand and quickly work the dough into a patty-shape.  Again, no lumps or clumps should be felt.  Feel free to drop the dough and re-wet hands in cold water as needed throughout this task.

Placed in hot skillet.
Set the dough pattyaside or slip it into the hot fat.  The dough will stick for a half-moment but should quickly loosen from the bottom of the skillet.  (If it doesn't, the skillet was not seasoned or heated prior to adding fat, OR the fat was not hot.)

Flip the dough when it is golden brown.
Remove the scalded bread when it is golden brown on both sides.  This bread with suck down grease.  Southern cooking has four food-groups: Salt, sugar, fat, and caffeine.  Enjoy it.  In fact, add a pat of butter to it prior to eating.  YUM!

Oh, another warning: Be ready to scrub the stove.  Like good fried chicken, this bread can place grease in places no one knew existed.  But soo good - so who cares!  Right?

This is one of the oldest recipes we have, which makes it even more of a treasure!  PePaw said that his mother made a recipe like it.  He called it "Mom's Paws" because he could see her fingermarks in the bread in the basket at dinner.  Mom and Granny told me that Mom Burch's recipe contained milk in it though.

Beef Stew - A Few of Many Variations

Few things in our family have more variations than beef stew.  It was a cold-weather staple that we had at least once a month.  Mom's beef stew was different from Granny's beef stew.  Mine is different from both of their versions.  To be honest, we all made significant variations on our own recipes based on what we have on-hand, our moods, etc.

There are some personal differences that never varied.  Granny's beef stew was far more beefy and the broth was thicker than the versions that Mom and I make.  Mom used canned beef broth from Swanson or College Inn.  We all use carrots, potatoes, onions, pepper, and chuck roast - not stew beef.

Making your own stew beef from chuck roast.
Now, stew beef is generally cut-up chuck roast, so why do we get the chuck roast and cut it up ourselves?  1. It's cheaper. Now days, it is cheaper by a good dollar or two.  2. When I was growing up, it was commonly know that "stew beef" was cut from beef cuts that were almost too old to sell.  Ew.  3.  Aunt Neet, who was married to Uncle Marvin, confirmed this for us when she worked at a meat processing house during WWII.  Prior to then, one did not purchase chicken thighs, for example.  Instead, the entire chicken was bought.  During WWII, "select" cuts came out.  Aunt Neet told us that birds that were damaged were cut up and bad pieces were discarded.  Who really wants a chicken leg from a bird that had a gangrene wing?  Yuck! 

Granny's father was a butcher.  He also stood by this assessment and, while they may not be true in today's supermarkets held by health regulations on meat handling, I simply cannot shake the image.  Besides: It's cheaper.  And I am my mother's child.  And the stew beef in the packaging looked dicey at best today.  A fourth reason: Cutting it up myself justifies the need for quality kitchen knives.  (The great-granddaughter of a butcher needs good kitchen knives as do the great-great grandchildren.)

Once the beef is cubed, here are the options:
  • Granny would dredge hers in flour and fry them in Crisco a few pieces at a time to get quality browning on each one of them.
  • Mom would sometimes dredge hers in flour but she usually skipped this step.  She would fry them in hot vegetable oil and only cared that no pink showed.
  • I generally dump mine in the pot with some kind of oil like sunflower, safflower, even olive oil because that is what I have on hand.  I then turn up the heat and will brown it until all pink is gone and some browning has started.
At this point, cube/cut veggies.  Again, there are options:
  • Granny added three stalks of celery, a pound of carrots, a large onion, and a pound or two of potatoes.  
  • Mom stayed true to the carrots, onion, and potatoes.  However, she would either add stalks of celery or a teaspoon or so of celery seed.  Sometimes, she would dice a handful of cabbage for flavor.
  • I tend to use carrots, onion, and potatoes and typically use celery seed over celery.  That is not the case today as I had celery on hand and did not have celery seed.   The cabbage is great, but I rarely have leftover raw cabbage around.
Dump the veggies on top of the browned beef.
Now it is time to add liquids and seasonings.  Again, options:
  • Granny would cover her veggies in beef stock and added a 15 or 16 ounce can of whole tomatoes.  Using her spoon, she would crush the tomatoes a bit prior to cooking.  She would add pepper and salt at this point.
  • Mom would cover her veggies in beef stock but added a large can of whole tomatoes crushing each tomato by hand - but she did not use crushed tomatoes because she wanted tomato pieces throughout her beef stew.  She added pepper but not salt at this point.
  • After using both of the options above, I generally use a jug of V-8 and either Wyler's beef bouillon or Kitchen Basics Beef Stock.  Sometimes, I will add a 15-16 ounce can of whole tomatoes and omit the V-8, but I find that I do this less and less.  I like the flavor that V-8 adds to the stew.  (I like the spicy V-8 but regular is tasty too.)  I add pepper but not salt at this point.   I didn't add the tomatoes this time around.
Probably a brand new version...
Even in cooking, there are options:
  • Granny placed her stew in a pressure cooker.  Now I do not like pressure cookers.  I'll write why at the bottom, but I know that it did not take her more than 15 minutes to get a fully cooked beef stew.  She would thicken the liquid with a bit of flour and beef stock, and adjust the seasonings prior to serving it. 
  • Mom cooked her beef stew in a Crock Pot.  Basically, brown the beef, toss in everything else and leave it on low for 10-12 hours.  (If you do not brown the beef, the potatoes become an icky pink color and, while I like pink, not that kind of pink.)  Adjust the seasonings.
  • I often cook mine in the oven for a few hours or on the stove for like 90 minutes to 2 hours or so when all veggies are at a point that I like them.  (This will depend on the size/thickness of the veggies/beef.)  I used to thicken the broth but it is something I have stopped doing.  Adjust the salt and pepper before serving.
Just add "spoon."
And in serving, there are even more options!
  • Granny would serve beef stew with most any kind of buttered bread, and would even serve it with crackers.  When she had time, she made scalded or fried bread.   
  • Mom almost always served this with scalded or fried bread.  She also added spaghetti to hers, which I hated.  (I now regret giving her grief for it because I now realize she was trying to stretch the meal.)
  • I typically serve it with cornbread or scalded/fried bread.  Mmmm.  Corn pone is good and, fortunately, all of my nieces and nephew have cast iron skillets to go that route.
Don't tell that I changed it....except for this recipe.  ;)
Normally, I would be all secretive on making changes to a family recipe, but this is one recipe where no one took offense if it was changed.  In hindsight, I believe this was because beef stew was a great way to use up odds and ends from other meals.  Trimmings from the pot roast could become stew beef.  An extra onion, few potatoes, some celery and carrots and one has a yummy meal.  Easy.

The Pressure Cooker Story: I was perhaps 10 years old and it was spring time.  The day was one of the first days when screen doors and windows were open.  Mom had spent all day scrubbing every wall, cabinet, appliance, corner of the floor, etc.  I'd help a bit, which means I was under her feet all day.  She decided to make chicken for dinner, but time had gotten away from her.  Crawling to the back of the cabinet, she got her pressure cooker.  We were putting away sponges, mops, etc. as the pressure cooker made its happy tsht-tsht sound.  Then it seemed to scream a psssssssssst that increased pitch with each passing moment.  To make it worse, the pressure cooker started to spin on the stove top and then it took flight.  It hit the ceiling, the walls, cabinets, and Mom shoved me out of the room.  It continued to wreck havoc on the room spewing chicken broth and fat all over the place.  Needless to say, Mom scrubbed everything until nearly midnight that night - and I have been slightly fearful of the pressure cooker since then.

For those unfamiliar with V8 or bouillon: 

V8 is a mixed vegetable juice.

Sunday, October 4, 2015

Soup Beans

MeMaw, Dad's mother, was the sweetest person.  Regardless of the time of the year, from just past breakfast until dinnertime, MeMaw had a pan of cornbread and a kettle of beans on the stove ready to feed any hungry person who landed on her doorstep.  In the summer, she had string beans, and in cold months, she would have some kind of dried beans - both were seasoned with some kind of smokey meat.   The beans would simmer on a back-burner all day and MeMaw would add water from time to time.  I do not remember a single time where MeMaw spoke in an angry tone or was mean toward another. I do recall a few (very few) times where she said, "Well, bless her heart."  That was as rough as she got. 

There was always plenty of room at MeMaw's house or table for an extra person.
Grandma Dora, MeMaw, and Granny were women who knew how to make a lot with very little.  Mom said that Granny made soup beans too, but she did not make them often after she went to work at Montgomery Wards.  Mom often made them in the cold weather months.  They are filling, tasty, last a few days, and can warm you up!  So I decided to make them today since it has been cold and rainy this weekend.

Now you will see different kinds of beans and seasonings used along with various kinds of meats in recipes.  However, they are all made essentially the same method: Soften the dried beans, add meat/seasonings, and cook.  Today, I made basic pinto beans because it was what I had on hand (most likely because it is what Mom most often used.)  Dad tells me to simply start with canned beans, but I don't think they turn out as good.  It may be psychosomatic, but I swear that I can taste the can.

1 pound of dried Pinto Beans
Dried beans need to be sorted.  Sometimes, there are small pebbles and other debris hiding in the beans.  I usually sprinkle a few in my hand, drop them into the colander before adding them to the pot.  In this bag, I found two pebbles and a small twig.

Rub the beans briskly between your hands after pouring water in the pan.
Once all beans are added to the pot, cover them with water and pick up handfuls to rub between your hands multiple times.  The water will become dirty.  In likelihood, it is probably ground dirt from where they were grown.  Drain the water, refill and repeat.

Swish and swirl with your hands.
It will likely take about three rinses.  Bulk beans will sometimes take four.  Don't be put off by the cleaning.  They are beans.  They grow in dirt.  :)

Water so clear that it will reflect the lights.
Once the water is clear, add water until it is about two to three inches above the bean line.  Set the pot on the burner and heat the water until it boils.  Then remove the pot from the heat and cover it for about an hour or two.  (This will depend on the size of the bean.  For pintos, an hour is generally long enough.)

Remove beans that float or debris that may float to the top.
 Give the beans a stir about half-way through the soak.  Bad beans will often surface along with any missed debris.  Remove those to discard.

Beans re-hydrated.

After the beans have re-hydrated, the water will be murky and the beans will be swollen and more pale in nature.  Drain the beans and rinse them once again.  Then return the beans to the pot and add enough water to cover by two inches again. 

Beans, water, and black pepper.
This is where you will add your seasonings.  I never add salt until the end, but added black pepper here.

Salt Pork
 Really, you can select most any smokey meat to season your soup beans.  (I'm certain that there are vegetarian options for this as well, but our family never went in that direction.)  I personally love salt pork for soup beans.  When I cannot find salt pork, I generally get a meaty, smoked ham hock and have the butcher slice it into 1/2 inch slices.  For a pound of beans, I suggest at least eight ounces of smoked meat.  Twelve might be better, depending on the meat.  I score the salt pork so that it can release flavor faster.

Salt pork, water, pepper, and beans.
Place the meat to ensure it is completely covered with water.  Bring the water to a boil and then simmer covered for at least two to three hours for pinto beans.  The cook time depends on the texture that you want your beans along with the kind of beans you use.  (Split peas, for example, will need a much shorter cook time.)  The longer the beans cook, the softer they will be. 

Cooked salt pork.
If a meat bone is used, keep it in the water longer.  However, if ham or salt pork are used, the meat will have given over its flavor after a few hours.  I fished the salt pork out and let it cool before removing the meat from it since I wanted the meat to be added back into my soup beans.  At this point, I tasted the liquid in the beans and adjusted salt.  Depending on the meat used, a lot of salt or no salt may be needed.  Never add more than a few teaspoons of salt at a time.  Then stir and wait a bit before re-tasting.

Soup Beans and Cornbread
 At this point, cook more if a thicker, less watery soup bean is desired.  I wanted a soupy end result, so I considered mine done.  If the water cooks down, more can be added.  All mine needed was cornbread, some pickled beets, and a green onion on the side.  Mmmm.