Wednesday, October 14, 2015

Beef Stew - A Few of Many Variations

Few things in our family have more variations than beef stew.  It was a cold-weather staple that we had at least once a month.  Mom's beef stew was different from Granny's beef stew.  Mine is different from both of their versions.  To be honest, we all made significant variations on our own recipes based on what we have on-hand, our moods, etc.

There are some personal differences that never varied.  Granny's beef stew was far more beefy and the broth was thicker than the versions that Mom and I make.  Mom used canned beef broth from Swanson or College Inn.  We all use carrots, potatoes, onions, pepper, and chuck roast - not stew beef.

Making your own stew beef from chuck roast.
Now, stew beef is generally cut-up chuck roast, so why do we get the chuck roast and cut it up ourselves?  1. It's cheaper. Now days, it is cheaper by a good dollar or two.  2. When I was growing up, it was commonly know that "stew beef" was cut from beef cuts that were almost too old to sell.  Ew.  3.  Aunt Neet, who was married to Uncle Marvin, confirmed this for us when she worked at a meat processing house during WWII.  Prior to then, one did not purchase chicken thighs, for example.  Instead, the entire chicken was bought.  During WWII, "select" cuts came out.  Aunt Neet told us that birds that were damaged were cut up and bad pieces were discarded.  Who really wants a chicken leg from a bird that had a gangrene wing?  Yuck! 

Granny's father was a butcher.  He also stood by this assessment and, while they may not be true in today's supermarkets held by health regulations on meat handling, I simply cannot shake the image.  Besides: It's cheaper.  And I am my mother's child.  And the stew beef in the packaging looked dicey at best today.  A fourth reason: Cutting it up myself justifies the need for quality kitchen knives.  (The great-granddaughter of a butcher needs good kitchen knives as do the great-great grandchildren.)

Once the beef is cubed, here are the options:
  • Granny would dredge hers in flour and fry them in Crisco a few pieces at a time to get quality browning on each one of them.
  • Mom would sometimes dredge hers in flour but she usually skipped this step.  She would fry them in hot vegetable oil and only cared that no pink showed.
  • I generally dump mine in the pot with some kind of oil like sunflower, safflower, even olive oil because that is what I have on hand.  I then turn up the heat and will brown it until all pink is gone and some browning has started.
At this point, cube/cut veggies.  Again, there are options:
  • Granny added three stalks of celery, a pound of carrots, a large onion, and a pound or two of potatoes.  
  • Mom stayed true to the carrots, onion, and potatoes.  However, she would either add stalks of celery or a teaspoon or so of celery seed.  Sometimes, she would dice a handful of cabbage for flavor.
  • I tend to use carrots, onion, and potatoes and typically use celery seed over celery.  That is not the case today as I had celery on hand and did not have celery seed.   The cabbage is great, but I rarely have leftover raw cabbage around.
Dump the veggies on top of the browned beef.
Now it is time to add liquids and seasonings.  Again, options:
  • Granny would cover her veggies in beef stock and added a 15 or 16 ounce can of whole tomatoes.  Using her spoon, she would crush the tomatoes a bit prior to cooking.  She would add pepper and salt at this point.
  • Mom would cover her veggies in beef stock but added a large can of whole tomatoes crushing each tomato by hand - but she did not use crushed tomatoes because she wanted tomato pieces throughout her beef stew.  She added pepper but not salt at this point.
  • After using both of the options above, I generally use a jug of V-8 and either Wyler's beef bouillon or Kitchen Basics Beef Stock.  Sometimes, I will add a 15-16 ounce can of whole tomatoes and omit the V-8, but I find that I do this less and less.  I like the flavor that V-8 adds to the stew.  (I like the spicy V-8 but regular is tasty too.)  I add pepper but not salt at this point.   I didn't add the tomatoes this time around.
Probably a brand new version...
Even in cooking, there are options:
  • Granny placed her stew in a pressure cooker.  Now I do not like pressure cookers.  I'll write why at the bottom, but I know that it did not take her more than 15 minutes to get a fully cooked beef stew.  She would thicken the liquid with a bit of flour and beef stock, and adjust the seasonings prior to serving it. 
  • Mom cooked her beef stew in a Crock Pot.  Basically, brown the beef, toss in everything else and leave it on low for 10-12 hours.  (If you do not brown the beef, the potatoes become an icky pink color and, while I like pink, not that kind of pink.)  Adjust the seasonings.
  • I often cook mine in the oven for a few hours or on the stove for like 90 minutes to 2 hours or so when all veggies are at a point that I like them.  (This will depend on the size/thickness of the veggies/beef.)  I used to thicken the broth but it is something I have stopped doing.  Adjust the salt and pepper before serving.
Just add "spoon."
And in serving, there are even more options!
  • Granny would serve beef stew with most any kind of buttered bread, and would even serve it with crackers.  When she had time, she made scalded or fried bread.   
  • Mom almost always served this with scalded or fried bread.  She also added spaghetti to hers, which I hated.  (I now regret giving her grief for it because I now realize she was trying to stretch the meal.)
  • I typically serve it with cornbread or scalded/fried bread.  Mmmm.  Corn pone is good and, fortunately, all of my nieces and nephew have cast iron skillets to go that route.
Don't tell that I changed it....except for this recipe.  ;)
Normally, I would be all secretive on making changes to a family recipe, but this is one recipe where no one took offense if it was changed.  In hindsight, I believe this was because beef stew was a great way to use up odds and ends from other meals.  Trimmings from the pot roast could become stew beef.  An extra onion, few potatoes, some celery and carrots and one has a yummy meal.  Easy.

The Pressure Cooker Story: I was perhaps 10 years old and it was spring time.  The day was one of the first days when screen doors and windows were open.  Mom had spent all day scrubbing every wall, cabinet, appliance, corner of the floor, etc.  I'd help a bit, which means I was under her feet all day.  She decided to make chicken for dinner, but time had gotten away from her.  Crawling to the back of the cabinet, she got her pressure cooker.  We were putting away sponges, mops, etc. as the pressure cooker made its happy tsht-tsht sound.  Then it seemed to scream a psssssssssst that increased pitch with each passing moment.  To make it worse, the pressure cooker started to spin on the stove top and then it took flight.  It hit the ceiling, the walls, cabinets, and Mom shoved me out of the room.  It continued to wreck havoc on the room spewing chicken broth and fat all over the place.  Needless to say, Mom scrubbed everything until nearly midnight that night - and I have been slightly fearful of the pressure cooker since then.

For those unfamiliar with V8 or bouillon: 

V8 is a mixed vegetable juice.

Sunday, October 4, 2015

Soup Beans

MeMaw, Dad's mother, was the sweetest person.  Regardless of the time of the year, from just past breakfast until dinnertime, MeMaw had a pan of cornbread and a kettle of beans on the stove ready to feed any hungry person who landed on her doorstep.  In the summer, she had string beans, and in cold months, she would have some kind of dried beans - both were seasoned with some kind of smokey meat.   The beans would simmer on a back-burner all day and MeMaw would add water from time to time.  I do not remember a single time where MeMaw spoke in an angry tone or was mean toward another. I do recall a few (very few) times where she said, "Well, bless her heart."  That was as rough as she got. 

There was always plenty of room at MeMaw's house or table for an extra person.
Grandma Dora, MeMaw, and Granny were women who knew how to make a lot with very little.  Mom said that Granny made soup beans too, but she did not make them often after she went to work at Montgomery Wards.  Mom often made them in the cold weather months.  They are filling, tasty, last a few days, and can warm you up!  So I decided to make them today since it has been cold and rainy this weekend.

Now you will see different kinds of beans and seasonings used along with various kinds of meats in recipes.  However, they are all made essentially the same method: Soften the dried beans, add meat/seasonings, and cook.  Today, I made basic pinto beans because it was what I had on hand (most likely because it is what Mom most often used.)  Dad tells me to simply start with canned beans, but I don't think they turn out as good.  It may be psychosomatic, but I swear that I can taste the can.

1 pound of dried Pinto Beans
Dried beans need to be sorted.  Sometimes, there are small pebbles and other debris hiding in the beans.  I usually sprinkle a few in my hand, drop them into the colander before adding them to the pot.  In this bag, I found two pebbles and a small twig.

Rub the beans briskly between your hands after pouring water in the pan.
Once all beans are added to the pot, cover them with water and pick up handfuls to rub between your hands multiple times.  The water will become dirty.  In likelihood, it is probably ground dirt from where they were grown.  Drain the water, refill and repeat.

Swish and swirl with your hands.
It will likely take about three rinses.  Bulk beans will sometimes take four.  Don't be put off by the cleaning.  They are beans.  They grow in dirt.  :)

Water so clear that it will reflect the lights.
Once the water is clear, add water until it is about two to three inches above the bean line.  Set the pot on the burner and heat the water until it boils.  Then remove the pot from the heat and cover it for about an hour or two.  (This will depend on the size of the bean.  For pintos, an hour is generally long enough.)

Remove beans that float or debris that may float to the top.
 Give the beans a stir about half-way through the soak.  Bad beans will often surface along with any missed debris.  Remove those to discard.

Beans re-hydrated.

After the beans have re-hydrated, the water will be murky and the beans will be swollen and more pale in nature.  Drain the beans and rinse them once again.  Then return the beans to the pot and add enough water to cover by two inches again. 

Beans, water, and black pepper.
This is where you will add your seasonings.  I never add salt until the end, but added black pepper here.

Salt Pork
 Really, you can select most any smokey meat to season your soup beans.  (I'm certain that there are vegetarian options for this as well, but our family never went in that direction.)  I personally love salt pork for soup beans.  When I cannot find salt pork, I generally get a meaty, smoked ham hock and have the butcher slice it into 1/2 inch slices.  For a pound of beans, I suggest at least eight ounces of smoked meat.  Twelve might be better, depending on the meat.  I score the salt pork so that it can release flavor faster.

Salt pork, water, pepper, and beans.
Place the meat to ensure it is completely covered with water.  Bring the water to a boil and then simmer covered for at least two to three hours for pinto beans.  The cook time depends on the texture that you want your beans along with the kind of beans you use.  (Split peas, for example, will need a much shorter cook time.)  The longer the beans cook, the softer they will be. 

Cooked salt pork.
If a meat bone is used, keep it in the water longer.  However, if ham or salt pork are used, the meat will have given over its flavor after a few hours.  I fished the salt pork out and let it cool before removing the meat from it since I wanted the meat to be added back into my soup beans.  At this point, I tasted the liquid in the beans and adjusted salt.  Depending on the meat used, a lot of salt or no salt may be needed.  Never add more than a few teaspoons of salt at a time.  Then stir and wait a bit before re-tasting.

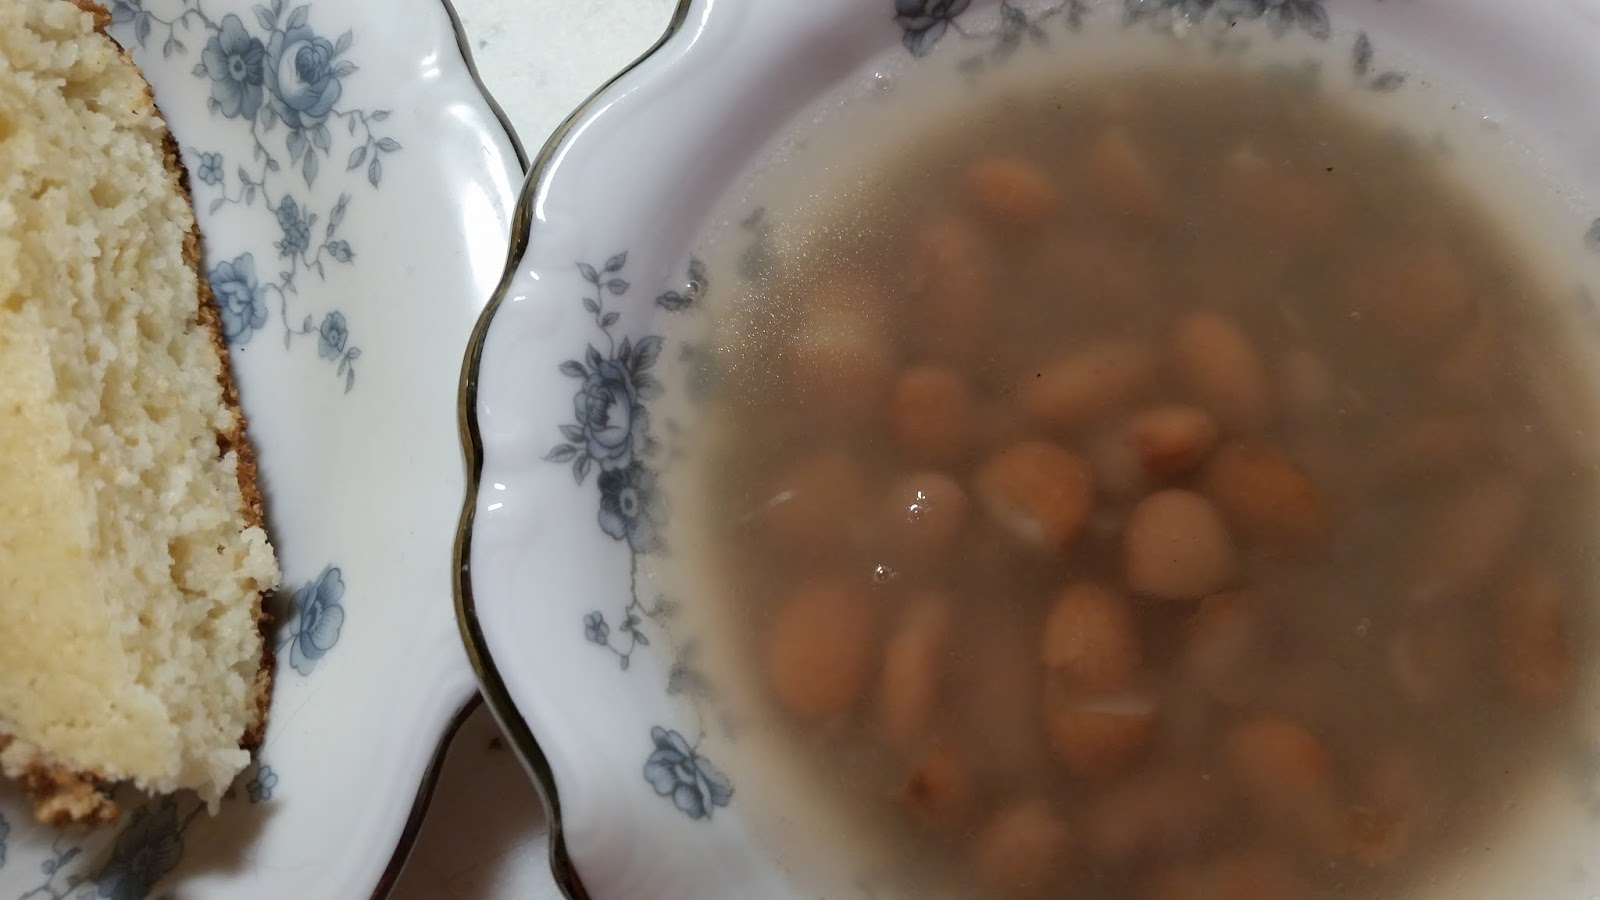
Soup Beans and Cornbread
 At this point, cook more if a thicker, less watery soup bean is desired.  I wanted a soupy end result, so I considered mine done.  If the water cooks down, more can be added.  All mine needed was cornbread, some pickled beets, and a green onion on the side.  Mmmm.


Thursday, January 1, 2015

Dumplings

As a child, the combination of dumplings and dressing meant Thanksgiving dinner.  I do not merely like dumplings.  I completely adore them.  Growing up, we did not have dumplings outside of Thanksgiving or Christmas.  I like dumplings so much that I will make them at other points in the year in the form of Chicken and Dumplings.  (When making Chicken and Dumplings, I would add some celery and carrots to cook in the broth.  Then add the dumplings.  Once done, add some leftover pieces of boneless, skinless chicken.)  From what I understand, this recipe was passed down from Grandma Dora's great-grandmother who likely got it from her great-grandmother. 

It starts simple: Flour, egg, and pepper.
Place a few (4-6) cups of all-purpose flour into a bowl.  Use the egg to make a well into the flour.  Add a lot of pepper - perhaps a scant teaspoon - and the egg into the well.

Mixing the egg and pepper.
Use fingers to blend the egg and pepper.  Start to work in the flour.

Egg, pepper, and flour.
Work in as much flour as possible.  Then add three-fourths of a cup of warm turkey broth.  (The broth should not be so hot it would cook the egg.)  Now, mix in more flour removing the egg and flour goop from fingers as much as possible.

Keep mixing in flour.
The flour and egg goop is sticky.  Keep mixing in more flour, scraping the sides of the bowl with fingers. 

Use flour-covered spoons or spatula to attempt to clean fingers.
Add more flour if needed!

Flour mixture starting to form a "ball."
"Add flour" is the answer whenever the dough starts to stick.  Eventually, the dough will form a ball as it is kneaded.  Once this happens, fold it on itself and let it rest for 10 minutes in the bowl.  Pull excess flour from hands with a paper towel and wash them well at this point.

Cut the ball into even pieces.
Cut the ball so that each piece will fit on the surface as it is rolled out.

Floured surface and rolling pin.
Ensure the work surface and rolling pin are heavily floured.  Pat the dough piece until it is flattened.  Then roll out the dough until it is very thin.

Keep pieces floured.
Roll out the other pieces quickly.

Cut into desired shapes.
Uneven edges do not matter.
Once rolled, cut into desired shapes and sizes.  Don't worry about the ends.  They won't matter.

Turkey broth
We do not stuff the turkey with stuffing, so we use the broth from the turkey.  If the bird is stuffed or if there is not enough broth, pre-purchased stock can be used.  Add salt, if needed.


Once the broth boils, start dropping dumplings.
The broth needs to be at a rolling boil before dumplings are dropped one at a time.  Seriously, ONE at a time.

Dumplings will float when done.
Even though some dumplings will be done before all are dropped, keep adding them to the pot.  When the surface is covered, broth will bubble up through dumplings.  Drop the new dumplings on the bubbles and give a stir once in a while.

All done!
Dumplings are pretty forgiving, so they can cook a bit longer if needed.  They will reheat in the microwave well too.  Honestly, dumplings look/seam harder to make than they are.  I've wanted to post about dumplings for a while, but I needed clean hands to snap pictures.

Middle-Niece Laura
This year, Laura did the hard work while I snapped pictures.  She is a natural cook in her own right!


Deviled Eggs

Over time, I have seen many ugly conversations among friends about who can conjure the best deviled eggs.  In fact, I once found myself in a contest with others over this very topic.  The result was that the other party-goers (aka judges) decided that MY deviled eggs were "something else" and could not be compared with the other deviled eggs.  Fine, fine.  By mid-evening, my deviled egg tray was the only tray completely void of eggs.  I think we know who won here.

The key to our family's deviled eggs is a salad dressing that pre-dates Grandma Dora.  It's really delicious but I cannot remember Mom or Granny using it in anything other than deviled eggs.  I used it once in a cabbage slaw, and it was good, but I kept craving deviled eggs.  According to Mom, Grandma Dora would drizzle the dressing on lettuce in the summertime.

Momma's handwriting.  Be ready to "stir & stir."
Growing up, we always had deviled eggs with ham.  We had them on Christmas Eve this year because my very Catholic sister opted to have ham for dinner that night rather than the fish or seafood that I generally have.  This year was very in line with what we had growing up as my mother held no Christmas eve dinner traditions - generally because she was still rushing to ensure she was ready for Christmas!  Since ham was on the menu, deviled eggs were a "must."

Not quite traditional method of making the dressing.
As the recipe shows, there is usually a lot of stirring between each step.  Also, a hunk on butter was added at the end.  (When Granny made it, the butter was melted and added.)  As you can see, my sister and I just dumped everything in and stirred. 

With apple cider vinegar added.
When we felt the egg and sugar were somewhat mixed, we added the vinegar, salt, and dried mustard.  And we stirred it a bit as we placed it on the double boiler.

It's really helpful to have a whisk.
  My father has given away about every useful cooking utensil in the house, so we stirred and stirred.  Still, it was hard to bust up the mustard lumps.

Stir, stir, stir.
We used the side of the pan to break up the mustard clumps.  The egg, sugar, and vinegar are starting to congeal a bit.  The butter is softening.  When I first made this dressing, this was the point where I was questioning whether it will turn out.

All smooth!
Suddenly, the dressing gets smooth as the butter mixes in and takes on a pretty lemony color.  Keep stirring until the consistency is uniformly thickened.  My sister hard-boiled the eggs.  (I do mine a different way but, since she peeled them, I did not complain!)  It was at this point we were giggling.  Both of us use beaters on the hard-cooked egg yolks and dressing to make the filling for the deviled eggs fluffy.

Fluffy filling!

The reason for the giggles was she was regaling a conversation with Mom that went something like this.

Mom: I just stir the dressing in with a fork. 
Sandy: I use beaters on mine.
Mom: I think a fork works fine. 
Sandy: I like using the beaters.
Mom (a bit later): How did you get your filling so fluffy?
Sandy: I use beaters.

Okay, I'm giggling again.  You would just have to know our mother.  (Well-played, Sandy.  Well-played.) 

Use a fork and fingers to fill.

There is no magical ratio on the yolks verses dressing.  We both add enough until the filling is creamy with a fair bit of stiffness and the flavor tastes right to us.  Then we fill the eggs with filling that is SO GOOD that it disqualifies you from a deviled egg contest by your egg-devouring friends!  There is no such thing as leftover filling.  Find eggs that need more and fill them.

All ready for dinner!

Sprinkle lightly with paprika to give a bit of color.  Cover with plastic wrap and place in the refrigerator until dinner.  These last several days in the refrigerator.  The dressing can last a month of more in a tightly sealed jar.

When using the rest of the dressing, it is tempting to use more dressing as it will be very thick but go cautiously.  The dressing thins out a bit as it warms. 

While I know that Grandma Dora made this, I would wager the recipe goes back to her mother or grandmother.  Everyone had chickens so eggs were often on the table in those days back when.  If my homeowner's association would let me have chickens, I'd likely have them more often too!

Sunday, November 30, 2014

"Chicken" Salad

Long after the special dishes and tablecloth were put away, a carcass with a lot of turkey remained.  My favorite use of these leftovers has always been turkey stew, but turkey salad is a close second!  This recipe comes from Granny, who always called it chicken salad - except when she made it with turkey.  However, even then, she would say, "I'm using that chicken salad recipe to make my salad."  I once asked Mom whether chicken salad had ever been made and she assured me that she often had chicken salad for lunch while growing up.  While in college, I made it with a can of chicken that I had laying about.  (The Miracle Whip should be significantly reduced when using canned poultry.)  Granny's chickens were snatched right off of the roost!

I likely wrote this recipe down when I was in college and in the possession of canned chicken.
Turkey salad was always made a few days after Thanksgiving (or Christmas.)  My first real memory of it being made was when Sandy and I were fairly small.  Max, my grandmother's German Shepard was scrunched beneath the kitchen table in the house on Cherry Street in Middlesboro.  To mince the meat, Mom and Granny used a pewter-colored, hand-cranked grinder.   The old refrigerator, which is in my basement and still runs, has "zones."  One of these undocumented zones will allow meat to almost freeze.  Chunks of turkey were placed in these zones and then were ground.  In retrospect, I think the meat may have been easier to grind that way.

My little Cuisinart makes short work of this job!
Granny would feed the grinder while Mom cranked.  Sandy sat with Granny's big blue bowl on her lap catching ground turkey.  Her feet may have been holding Max at bay.  (Max was the most awesome dog.  He was one of Sheena's puppies, stole toys from kids in the neighborhood, and adored Fig Newton cookies.)  In hindsight, I'm not sure why we did not put him on the back porch.  Evenings were Max's time to visit in the kitchen, so perhaps that is why. Needless to say, the floor was spotless around the grinder.

Only green olives and sweet gherkins (midgets were preferred.)

 I remember peeling eggs.  I also remember Mom chopping eggs, celery, pickles and olives super finely too.  I don't remember them being ground up, but they may have been!  I'm really lazy and I have a Cuisinart so I chop mine finely there!
 
Turkey, eggs, celery, olives, and sweet pickle.
Though I am certain that real mayonnaise was used when I was growing up, I don't remember any recipe that required anything but Miracle Whip.  I'll even admit that I did not realize they were different products until I was nearly grown and made something that required real mayonnaise, and I was sad to discover the two items are not interchangeable.

Add Miracle Whip a bit at a time.
Add a bit of salt and some Miracle Whip.  Then mix.

Now, I do enjoy my kitchen gadgets and toys.  However, when it comes to mixing, nothing beats clean hands!  A food processor will turn this into turkey glue.

Use your hands!  Seriously!
The turkey salad will absorb some of the Miracle Whip, but more is easier to add than it is to take it back out.  Once everything is well-mixed, put it in a covered bowl and let it rest for a few hours.

Resting in the bowl.
Sometimes, it would be molded by the bowl and served with Keebler Club Original Crackers.  Other times, we would have it on toast with tomatoes, etc.  In either case, it is just plain yummy.  (There are some rebels among us who like this on Ritz crackers, but I've always believed that nothing tastes better when sitting on a Ritz.  Nothing.)