Thursday, January 1, 2015

Dumplings

As a child, the combination of dumplings and dressing meant Thanksgiving dinner.  I do not merely like dumplings.  I completely adore them.  Growing up, we did not have dumplings outside of Thanksgiving or Christmas.  I like dumplings so much that I will make them at other points in the year in the form of Chicken and Dumplings.  (When making Chicken and Dumplings, I would add some celery and carrots to cook in the broth.  Then add the dumplings.  Once done, add some leftover pieces of boneless, skinless chicken.)  From what I understand, this recipe was passed down from Grandma Dora's great-grandmother who likely got it from her great-grandmother. 

It starts simple: Flour, egg, and pepper.
Place a few (4-6) cups of all-purpose flour into a bowl.  Use the egg to make a well into the flour.  Add a lot of pepper - perhaps a scant teaspoon - and the egg into the well.

Mixing the egg and pepper.
Use fingers to blend the egg and pepper.  Start to work in the flour.

Egg, pepper, and flour.
Work in as much flour as possible.  Then add three-fourths of a cup of warm turkey broth.  (The broth should not be so hot it would cook the egg.)  Now, mix in more flour removing the egg and flour goop from fingers as much as possible.

Keep mixing in flour.
The flour and egg goop is sticky.  Keep mixing in more flour, scraping the sides of the bowl with fingers. 

Use flour-covered spoons or spatula to attempt to clean fingers.
Add more flour if needed!

Flour mixture starting to form a "ball."
"Add flour" is the answer whenever the dough starts to stick.  Eventually, the dough will form a ball as it is kneaded.  Once this happens, fold it on itself and let it rest for 10 minutes in the bowl.  Pull excess flour from hands with a paper towel and wash them well at this point.

Cut the ball into even pieces.
Cut the ball so that each piece will fit on the surface as it is rolled out.

Floured surface and rolling pin.
Ensure the work surface and rolling pin are heavily floured.  Pat the dough piece until it is flattened.  Then roll out the dough until it is very thin.

Keep pieces floured.
Roll out the other pieces quickly.

Cut into desired shapes.
Uneven edges do not matter.
Once rolled, cut into desired shapes and sizes.  Don't worry about the ends.  They won't matter.

Turkey broth
We do not stuff the turkey with stuffing, so we use the broth from the turkey.  If the bird is stuffed or if there is not enough broth, pre-purchased stock can be used.  Add salt, if needed.


Once the broth boils, start dropping dumplings.
The broth needs to be at a rolling boil before dumplings are dropped one at a time.  Seriously, ONE at a time.

Dumplings will float when done.
Even though some dumplings will be done before all are dropped, keep adding them to the pot.  When the surface is covered, broth will bubble up through dumplings.  Drop the new dumplings on the bubbles and give a stir once in a while.

All done!
Dumplings are pretty forgiving, so they can cook a bit longer if needed.  They will reheat in the microwave well too.  Honestly, dumplings look/seam harder to make than they are.  I've wanted to post about dumplings for a while, but I needed clean hands to snap pictures.

Middle-Niece Laura
This year, Laura did the hard work while I snapped pictures.  She is a natural cook in her own right!


Deviled Eggs

Over time, I have seen many ugly conversations among friends about who can conjure the best deviled eggs.  In fact, I once found myself in a contest with others over this very topic.  The result was that the other party-goers (aka judges) decided that MY deviled eggs were "something else" and could not be compared with the other deviled eggs.  Fine, fine.  By mid-evening, my deviled egg tray was the only tray completely void of eggs.  I think we know who won here.

The key to our family's deviled eggs is a salad dressing that pre-dates Grandma Dora.  It's really delicious but I cannot remember Mom or Granny using it in anything other than deviled eggs.  I used it once in a cabbage slaw, and it was good, but I kept craving deviled eggs.  According to Mom, Grandma Dora would drizzle the dressing on lettuce in the summertime.

Momma's handwriting.  Be ready to "stir & stir."
Growing up, we always had deviled eggs with ham.  We had them on Christmas Eve this year because my very Catholic sister opted to have ham for dinner that night rather than the fish or seafood that I generally have.  This year was very in line with what we had growing up as my mother held no Christmas eve dinner traditions - generally because she was still rushing to ensure she was ready for Christmas!  Since ham was on the menu, deviled eggs were a "must."

Not quite traditional method of making the dressing.
As the recipe shows, there is usually a lot of stirring between each step.  Also, a hunk on butter was added at the end.  (When Granny made it, the butter was melted and added.)  As you can see, my sister and I just dumped everything in and stirred. 

With apple cider vinegar added.
When we felt the egg and sugar were somewhat mixed, we added the vinegar, salt, and dried mustard.  And we stirred it a bit as we placed it on the double boiler.

It's really helpful to have a whisk.
  My father has given away about every useful cooking utensil in the house, so we stirred and stirred.  Still, it was hard to bust up the mustard lumps.

Stir, stir, stir.
We used the side of the pan to break up the mustard clumps.  The egg, sugar, and vinegar are starting to congeal a bit.  The butter is softening.  When I first made this dressing, this was the point where I was questioning whether it will turn out.

All smooth!
Suddenly, the dressing gets smooth as the butter mixes in and takes on a pretty lemony color.  Keep stirring until the consistency is uniformly thickened.  My sister hard-boiled the eggs.  (I do mine a different way but, since she peeled them, I did not complain!)  It was at this point we were giggling.  Both of us use beaters on the hard-cooked egg yolks and dressing to make the filling for the deviled eggs fluffy.

Fluffy filling!

The reason for the giggles was she was regaling a conversation with Mom that went something like this.

Mom: I just stir the dressing in with a fork. 
Sandy: I use beaters on mine.
Mom: I think a fork works fine. 
Sandy: I like using the beaters.
Mom (a bit later): How did you get your filling so fluffy?
Sandy: I use beaters.

Okay, I'm giggling again.  You would just have to know our mother.  (Well-played, Sandy.  Well-played.) 

Use a fork and fingers to fill.

There is no magical ratio on the yolks verses dressing.  We both add enough until the filling is creamy with a fair bit of stiffness and the flavor tastes right to us.  Then we fill the eggs with filling that is SO GOOD that it disqualifies you from a deviled egg contest by your egg-devouring friends!  There is no such thing as leftover filling.  Find eggs that need more and fill them.

All ready for dinner!

Sprinkle lightly with paprika to give a bit of color.  Cover with plastic wrap and place in the refrigerator until dinner.  These last several days in the refrigerator.  The dressing can last a month of more in a tightly sealed jar.

When using the rest of the dressing, it is tempting to use more dressing as it will be very thick but go cautiously.  The dressing thins out a bit as it warms. 

While I know that Grandma Dora made this, I would wager the recipe goes back to her mother or grandmother.  Everyone had chickens so eggs were often on the table in those days back when.  If my homeowner's association would let me have chickens, I'd likely have them more often too!

Sunday, November 30, 2014

"Chicken" Salad

Long after the special dishes and tablecloth were put away, a carcass with a lot of turkey remained.  My favorite use of these leftovers has always been turkey stew, but turkey salad is a close second!  This recipe comes from Granny, who always called it chicken salad - except when she made it with turkey.  However, even then, she would say, "I'm using that chicken salad recipe to make my salad."  I once asked Mom whether chicken salad had ever been made and she assured me that she often had chicken salad for lunch while growing up.  While in college, I made it with a can of chicken that I had laying about.  (The Miracle Whip should be significantly reduced when using canned poultry.)  Granny's chickens were snatched right off of the roost!

I likely wrote this recipe down when I was in college and in the possession of canned chicken.
Turkey salad was always made a few days after Thanksgiving (or Christmas.)  My first real memory of it being made was when Sandy and I were fairly small.  Max, my grandmother's German Shepard was scrunched beneath the kitchen table in the house on Cherry Street in Middlesboro.  To mince the meat, Mom and Granny used a pewter-colored, hand-cranked grinder.   The old refrigerator, which is in my basement and still runs, has "zones."  One of these undocumented zones will allow meat to almost freeze.  Chunks of turkey were placed in these zones and then were ground.  In retrospect, I think the meat may have been easier to grind that way.

My little Cuisinart makes short work of this job!
Granny would feed the grinder while Mom cranked.  Sandy sat with Granny's big blue bowl on her lap catching ground turkey.  Her feet may have been holding Max at bay.  (Max was the most awesome dog.  He was one of Sheena's puppies, stole toys from kids in the neighborhood, and adored Fig Newton cookies.)  In hindsight, I'm not sure why we did not put him on the back porch.  Evenings were Max's time to visit in the kitchen, so perhaps that is why. Needless to say, the floor was spotless around the grinder.

Only green olives and sweet gherkins (midgets were preferred.)

 I remember peeling eggs.  I also remember Mom chopping eggs, celery, pickles and olives super finely too.  I don't remember them being ground up, but they may have been!  I'm really lazy and I have a Cuisinart so I chop mine finely there!
 
Turkey, eggs, celery, olives, and sweet pickle.
Though I am certain that real mayonnaise was used when I was growing up, I don't remember any recipe that required anything but Miracle Whip.  I'll even admit that I did not realize they were different products until I was nearly grown and made something that required real mayonnaise, and I was sad to discover the two items are not interchangeable.

Add Miracle Whip a bit at a time.
Add a bit of salt and some Miracle Whip.  Then mix.

Now, I do enjoy my kitchen gadgets and toys.  However, when it comes to mixing, nothing beats clean hands!  A food processor will turn this into turkey glue.

Use your hands!  Seriously!
The turkey salad will absorb some of the Miracle Whip, but more is easier to add than it is to take it back out.  Once everything is well-mixed, put it in a covered bowl and let it rest for a few hours.

Resting in the bowl.
Sometimes, it would be molded by the bowl and served with Keebler Club Original Crackers.  Other times, we would have it on toast with tomatoes, etc.  In either case, it is just plain yummy.  (There are some rebels among us who like this on Ritz crackers, but I've always believed that nothing tastes better when sitting on a Ritz.  Nothing.)

Thursday, November 27, 2014

Thanksgiving Salad

Thanksgiving Salad is on the plate with green olives and cranberry sauce.
Happy Thanksgiving 2014!  As you can see, I made most of the traditional items.  Needless to say I will be eating leftovers all week.  Most of the food pictured pre-dates Mom, Sandy, or me.  Thanksgiving Salad does not!  My sister may know the history of this recipe, but I am not certain from where it came.  It materialized on Mom's table shortly before I went to college and became an instant hit!

Granny always made a citrus salad, which I love, and a Waldorf salad, which I never found to my taste.  Citrus salad is easy to make.  A can of pineapple, supreme an orange, peel and chop an apple, slice a banana, and add some pecan pieces.  Mix and let it set in the fridge for a few hours.  Refreshing and delicious.  It was one of the first holiday dishes that I learned to make.  (I really should make it again.  Perhaps at Christmas!)

Daddy never liked Citrus or Waldorf salad due to the nuts in them.  He liked the Thanksgiving salad though.  We all did, and it became part of the table tradition!  I remember the first year that I had it.  Mom cooked, we ate, and then...we started to decorate for Christmas.  Mom was determined to deck the halls the day after Thanksgiving that year for some reason.  Thanksgiving day was chilly, but the following day was very cold.  While hanging decorations outside, we would dash inside to warm up, and I kept eating spoons of Thanksgiving salad on these breaks.

It's easy to make.  Here are the specifics.

Pineapple, Carrots, Sugar, Gelatin, and Water.
Add roughly two cups of canned, unsweetened, crushed pineapple, 2 cups of grated carrots, two packets of unflavored gelatin, 1 cup sugar, and 1/2 cup of water to a pot.  Heat until mixed and bubbly stirring often to keep anything from sticking.

All mixed up
Once it starts to bubble and boil, turn it to a simmer and allow it to cook until the carrots are tender.  This will take about 20 to 30 minutes.

I need my timer.
Stir often to prevent the mixture from sticking.  Once the carrots are tender (but still have some bite to them,) turn off the heat and add two 8 ounce blocks of Philadelphia cream cheese.

Stir, stir, stir.
Mom's recipe says to mix the cream cheese with the whipped cream until it is creamy and then add to the carrot/pineapple mixture.  I simply dump the cream cheese in the hot pot and let the heat melt it while I stir.  Using my spatula, I smash up the clumps until it is creamy.  Then, add 2 cups of whipping cream.

Whipping cream added.
Now gently stir until everything is of an even consistency.  Scrap the sides to make sure that everything is well-mixed.  Then just pour it into a 9 x 13 glass dish.  (Obviously this could be halved and poured into an 8x8 pan.)
In the glass dish.

Using the spatula, evenly distribute everything and cover it with plastic wrap.  (I have yet to keep the plastic wrap from touching the salad.  It's my yearly game.)  Place in the refrigerator overnight.

I make this most years now.  An amusing side note: Every single person to whom I have served this has said, "This is more like dessert."  Then they take a second bite and a third.  I've had several people who return to join for Thanksgiving dinner.  Every single one of them asks, "We are having that white salad, right???"  I say, "Oh...well, sure.  For dessert."  I get this silent, dead stare until they realize that I am joking.  It continues to be a fun tradition that is clearly my own.

Happy Thanksgiving!

Monday, November 17, 2014

Granny's Fruitcake

In the days before malls, once Thanksgiving had passed, Christmas would appear almost overnight.  We knew this because a heavy box with a huge tin would arrive.  Inside, wrapped in foil, was brandy-soaked cheesecloth containing Granny's fruitcake.  This fruitcake was very moist, dark, and heavy.  There was only enough cake to hold the fruit together.  Mom and I could not wait to eat a bite, but a bite was all anyone could eat!  It's very rich. 

Freshly Baked Fruitcake Loaf
When Granny passed, the era of fruitcake went with her.  Mom did not make them - perhaps it is because they were so closely associated with Granny.  I also think other factors were involved.  First, fruitcake has a huge list of ingredients.  Secondly, it is expensive to make.  Third, one should start fruitcake in mid-October.  (Some people make them years in advance!)  Last of all, it needs 100 proof apple brandy.  (Just try to find the stuff!)

The thought to make fruitcakes would hit Mom about mid-December.  I guess she never thought to make them for the following year.  One year, she made a cookie called "fruitcake bites."  They were not bad, but they are a far-cry from Granny's fruitcake.  In retrospect, it was amusing to watch Mom dribble brandy on them!

This recipe has three different hand-annotations.  The misspelled words I believe are mine!
I'm sure that Mom knew how to make fruitcake, but I believe that, like me, she had not ever made them on her own.  Unlike me, I do think she made them with Granny a lot when she was younger.  Once, I helped to make them when I was in college and Granny was in Lafayette in October.  By "help," I used my hands to mix everything under the supervision of Granny while Mom lined pans.

Why I decided to make fruitcake this year bewilders me.  I just wanted to have it this year for Christmas.  So, in October, I started to collect ingredients.   It was obviously late in the year when I actually made the fruitcakes.  To be honest, the job suddenly felt overwhelming due to lack of clear directions.  For example, I decided that candied pineapple should be used, but I was not certain when I started.  I could not find it grated, so ended up cutting it up the best that I could.  (I'm still not 100% certain about the pineapple, but know it would not have been fresh and I believe that canned pineapple would mold.)  I decided this past weekend to simply go for it.  

These two pictures are the extent of the directions.
I started with the fruits and nuts.  They needed chopped.  As I chopped and chopped, I realized that my largest mixing bowl would not be big enough.  A quick flashback reminded me that we mixed everything in Mom's huge roasting pan.  I have an enameled dish pan that I've used in prepping veggies for canning, so that is what I used.  When purchasing ingredients, I was unsure what kind of nuts to use.  Granny bought mixed nuts in bulk, and we spent hours cracking and picking nuts until we had 2 pounds of nutmeats.

I ended up using a mix of pecans, hazelnuts, walnuts, and Brazil nuts.  I also remember that Granny did not use green candied cherries.  The dates and figs that she used came in a small, wrapped packages and felt more wet than what I found.  Granny used dark raisins only whereas I had a raisin medley on hand.  Once everything is chopped, I mixed the nuts and fruits until all was evenly distributed.

Dried Fruit and Nuts mixed.
The wet ingredients and the flour filled my largest mixing bowl.  I should have made sure that the butter was softened, before adding sugar, spices, butter, jelly, molasses, brandy and buttermilk.  Mix it well.  Then mix in the six eggs.

Making the batter base.
 Next, add the flour in two batches and mix until smooth.  I do remember that Granny never wanted to "work the flour too much."

Adding flour to the batter.
Then add the batter to the fruit and nut mixture and mix by hand until everything is coated.  The recipe says to line pans with wax paper and "double-strength brown paper."  I honestly remember using brown paper grocery bags!  I do not have a pan as big as Granny's fruitcake pan.  Plus, I wanted to make smaller fruitcakes as gifts.  So I used disposable, brown-paper loaf pans.  I baked at the suggested 225 degrees Fahrenheit.  With the smaller size, I kept testing the cakes and may have gotten them a bit overdone.  These baked for just under 3 hours.  There are 12 fruitcakes in total.

Amoebic-shaped Fruitcakes
After they cooled, I removed them from the paper loaf-pans and placed them on brandy-soaked cheesecloth.  Using a basting brush, I coated them with brandy.  (For the 12 cakes, I milked the dregs of an entire pint of brandy.  And I will need more to "feed" them every 3 or 4 days as they "age.")  I could have used much more brandy here.  (If I make these again, I will use more cheesecloth and fifth of brandy instead of a pint.)

Adding more brandy to the fruitcakes.
Once they were coated in brandy, I wrapped them tightly in foil.  I will flip them every day until the third or fourth day when I coat them with more brandy. 

I know the recipe used here came from Grandma Dora.  She loved dried fruits and had a huge round table with glass balls in eagle talons that sat in the corner of her dining room.  (Mary Jane, Granny's older sister, got that table and gave it to her son.)  At Christmastime, Grandma Dora always received a platter of dried fruit from her nephew Charlie Fuller.  The platter came with a "holiday" prong.  Mom always thought it was quite elegant.  Sometimes, I wonder if Grandma Dora did not make fruitcakes to use the leftover dried fruit.

All in all, the fruitcakes were very time consuming, but were not difficult to make.  If they are yummy, I will definitely reconsider why I never made these for Mom.  I would have loved to have surprised her with one.

[11/27/2014 Update: These little fruitcakes and gulped down more than a fifth of brandy at this point.]

[1/1/2015 Update: A friend teased that she was arrested for DUIF (Driving under the influence of Fruitcake.)  I'll make them a bit earlier next time!]

Sunday, October 12, 2014

Stuffed Cabbage aka Cabbage Rolls aka Galumpkis

Growing up, ethnic food generally meant spaghetti.  I don't remember Granny or Memaw making spaghetti, but Mom made it a lot.  Sandy loved spaghetti.  As an earlier post mentions, I love stuffed peppers.  Mom also made stuffed onions, which Pepaw loved.  Other than that, I don't remember many attempts at stuffed vegetables.  Mom once found a recipe for cabbage rolls in a magazine and made them.  The recipe used Campbell's tomato soup and it simply was not very good. 

I've always loved ethnic foods and I love cabbage, but never found a recipe for stuffed cabbage recipe that suited until Momma Z. gave me this one that she created using her own Polish/Irish know-how!  These are savory, warm, and delicious!  I believe it was the recipe that Mom thought she found in that magazine! 

Ingredients!
The ingredients are as follows: 1 huge head of cabbage, 1 1/2 pound of ground beef, 1/2 pound of hot/zesty sausage (Bob Evans, Jimmy Dean, etc.  I used Esskay here.) 1 medium onion (chopped,) 1/2 to 1 cup cooked white rice, 1 cup tomato sauce, salt, pepper, whole tomatoes, and stewed tomatoes.

Close-up of hamburger, sausage, tomato sauce, rice, onion, salt and pepper.
Mix this all up and let it rest.  Boil enough water to cover the head of cabbage.  Cut around the stem of cabbage and dunk in the water until the leaves start to loosen.  As the leaves loosen, remove them and place in a colander.  When the leaves are too small to remove, chop them to lay in the bottom of the slow cooker or Dutch oven along with a bit of left-over tomato sauce.  If no tomato sauce remains, just pour in a bit of water as you rinse the tomato cans! 

Chopped cabbage with some sauce on the bottom of the Dutch oven!

Cabbage leaves waiting for stuffing!
 And the fun begins!  Take a bit of the stuffing and place it near the cut end of the cabbage leaf.  Then roll the stem end over once, fold in the sides, and roll the rest of the leaf around the stuffing. 
The smallest leaf with some stuffing.

It's the BABY cabbage roll!

This is what the larger rolls look like!
 Adjust the amount of stuffing so that you have enough for all of the leaves.  Lay the cabbage rolls seam-side down on top of the chopped up leaves.

Pack them so they cannot unroll while cooking, but give a bit of space so the juices can baste around them too!
 I put 1/2 of the stewed and 1/2 of the whole tomatoes (mushed up a bit) over the first layer of cabbage rolls.
First layer.
 Honestly, you can use only tomato sauce, or whole tomatoes, diced tomatoes, or stewed tomatoes.  I like using a mix. 
Second layer!
 Place the second layer right on top of the first.  Then add the rest of the tomatoes!

Pretty!
 The leaves which were kind of intact, but did not remove prettily can be used to cover the entire thing to hold in moisture.  This is not as important in a slow cooker, but is useful if cooked in the oven.
Ready for baking!
 Cover with a lid.  Cook 2 hours at 350 degrees Fahrenheit if made in a Dutch oven.  If using a slow cooker, cook on low for 10 to 12 hours.

Opening the lid.
 The top leaves dried a bit.  No worries!

With the top leaves removed!
 The rolls below are lovely.

With a side of mashed potatoes.
You all know how to make mashed potatoes.  Right?  Here I used Russett potatoes, butter, salt, pepper, and whole milk.  I cook the potatoes until just done.  Drain well, lightly smash them with salt, pepper and butter and then add milk.  If you over mash them, it has the consistency of wallpaper paste - but...I'm positive you know how to do this.  :)


Saturday, August 9, 2014

14-Day Sweet Pickles

14-day sweet pickles are mysterious things.  Basically, a crock would spring up overnight at some point in August/September.  A towel would cover it and one instinctively understood not to touch it.  The crock would never budge and then it would quietly disappear in two weeks.  In the winter, awesome meals such as soup beans and cornbread would be enhanced by the emergence of 14-day pickles, which are sweet and crunchy and embody pickle-awesomeness.

My mother was a night owl as was her father.  (Honestly, I'm a night owl too, and I sometimes feel like a vampire with a paper route by having a day job.)  Mom's pickle-making endeavors always occurred at night  When Dad left Borden's Dairy and went to work at General Foods, Mom's nocturnal pickle-making endeavors began.  I really don't remember Mom making pickles when we were small.  Pickle production continued when Dad left General Foods and went to work for R. H. Donnelly Corporation.  Even when Mom's cancer came out of remission, pickles were made.  Sadly, they slowed to a stop when she had to depend on Dad to lift the crock.  Daddy never minded helping, but I think Mom simply liked making them while home alone.

To be honest, I'm not sure that I have her exact recipe as there are some variations and I don't know which was her "tried and true" favorite.  Sometimes she made slices and sometimes spears.  I decided to make chunky slices.

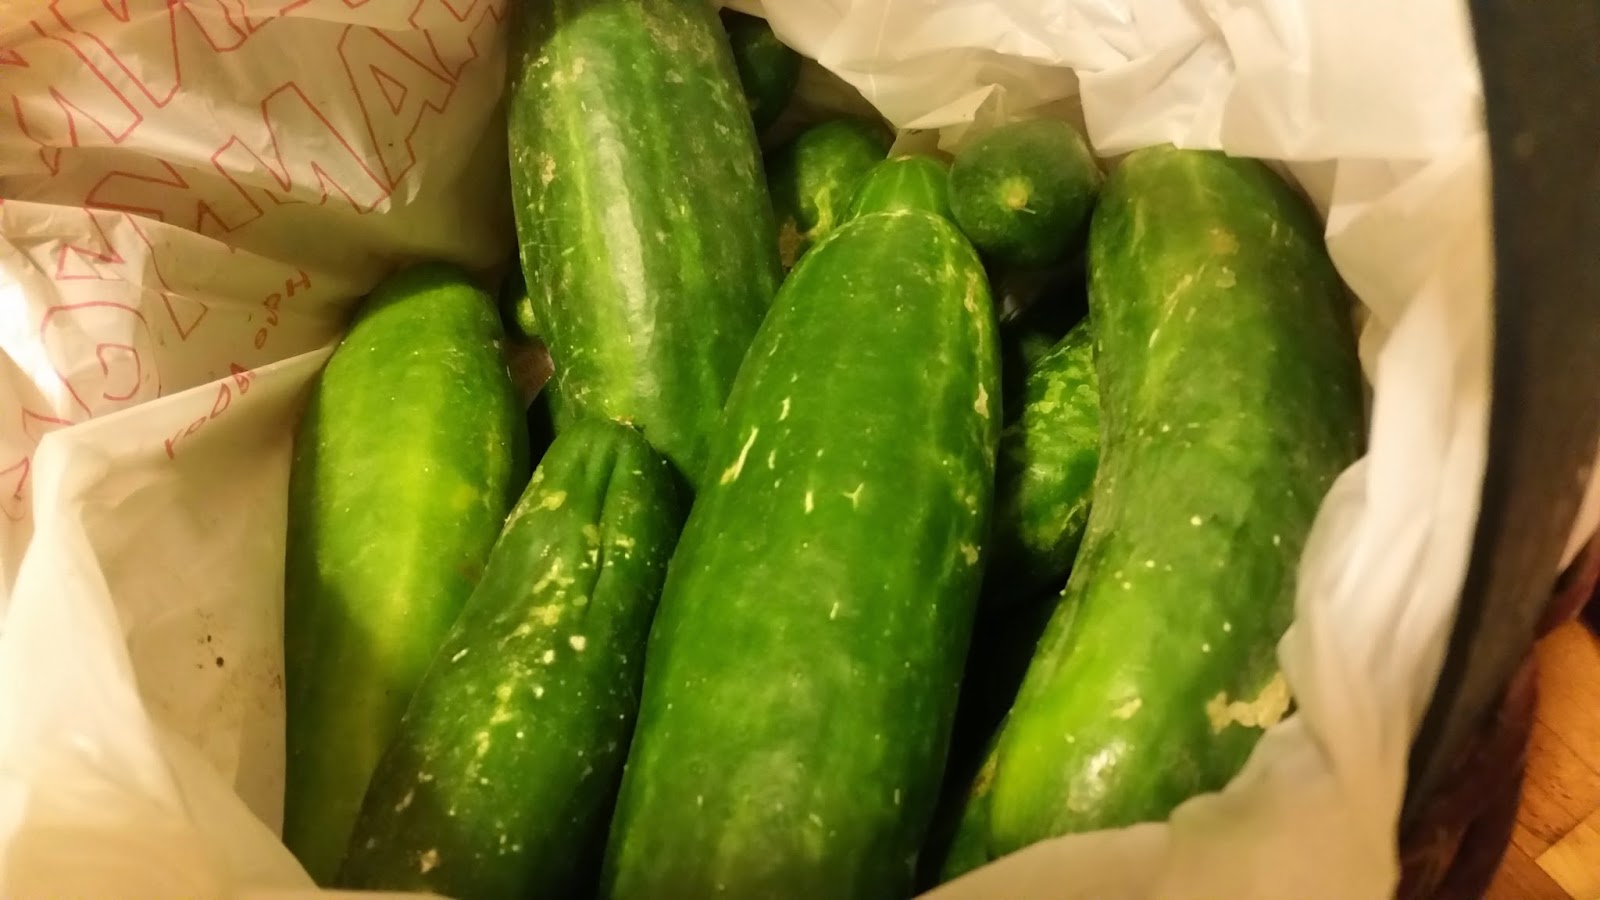
First, be sure the cucumbers used are not "burp-less."  Mom said burp-less cucumbers made mushy pickles.  I never question when knowledge like this is given to me.  Two weeks is a lot of work to chance mushy pickles.  This summer, I had a booming cucumber crop!  14-day pickles were a given!

Surpremo and Straight Eight cumcumbers
I've not found a really good heirloom cucumber for pickles.  This season, I grew Supremo cucumbers, which is a pickling hybrid, and also Straight Eight heirlooms.  Both were used in my pickles. 

For a gallon of cucumbers, you will need 3 heaping tablespoons of alum, 8 cups of sugar, 1 cup of pickling salt, 6 cups of vinegar, 1/2 cup of pickling spice, 2 teaspoons of celery seed, 6 cinnamon sticks, gauze, water, and a crock.  (Mom used a huge open-topped crock that she covered with a towel.  I use a 5 liter Harsh Gairtopf fermenting crock that I bought for making sauerkraut.)

Day 1: Wash the cucumbers and cut a slice off of the blossom end.  (There is an enzyme in the blossom spot that can make the pickles mushy....or so I have been told.  Don't take chances.)  Slice or cut your cucumbers into desired shapes.  Place cucumbers in the crock.

Make a brine of 1/4 cup of pickling salt with 2 quarts of water.  Bring the brine to a boil and pour over the cucumbers.  Place a weight on the cucumbers and cover the crock.  Let the crock rest somewhere.  (The National Center for Home Food Preservation recommends letting it rest in a 70 degree Fahrenheit room.)

Day 3: Pour off the salt water and rinse the cucumbers.  Make another brine with 1/4 cup pickling salt and 2 quarts of boiling water.  Pour over the cucumbers, place the weight, and cover to let rest.

Days 5 & 7: Same as Day 3.

Cucumbers in Crock.
Day 9: Drain and rinse cucumbers.  Clean the crock and weights.  Place cucumbers in crock.  Make a solution with two quarts of boiling water with a heaping tablespoon of alum.  Pour over cucumbers, replace weights and cover to let rest.

Days 10 & 11: Same as Day 9.

Day 12: Drain and rinse cucumbers.  Clean the crock and weights.  Place the cucumbers inside of the crock.  Bundle the pickling spice and celery seed inside of the gauze.  (This is really optional, but I didn't want loose spices in my jar.)  Cinnamon sticks can be bundled in the spice bundle as can red chili peppers if a spicy-sweet flavor is desired.  (I used the cinnamon, but not the chili peppers for my pickles.)  Heat the vinegar with 5 cups of sugar and the spice bundle until it boils.  Pour the syrup and spice bundle over cucumbers.  Place the weights and cover.

Day 13: Drain cucumbers but SAVE the syrup and spice bundle.  Add two cups of sugar to the syrup and bring to a boil.  Pour over the cucumbers and cover.

Day 14: Drain the cucumbers but SAVE the syrup and spice bundle.  Add one cup of sugar to the syrup and bring to a boil.  Clean canning jars and pack cucumbers into jars.  Ladle syrup over the cucumbers leaving 1/2 inch of air space.  Seal jars and process in a water bath canner for 15 minutes.  (Spice bundle can be discarded or spices can be added to jars.)

I used white vinegar, but do not know whether Mom used apple cider vinegar or white vinegar though.  I should take a jar to Daddy.
All ready for winter.